Unlimited Product Images.
No More costly photo shoots.
Put creative control in the hands of the marketer. Virtual Studio creates unlimited product content at the push of a button allowing you to create content assets and save money costly and time-consuming photo and video shoots. Without re-shoots for new features, colors, or materials, 3D product content provides the asset you need today and the flexibility for unlimited change.
VIRTUAL STUDIO capabilities

- Edit & save camera angles in Product Settings
- Select from multiple published product versions
- Select from multiple lighting environments. Your Dopple team can create custom lighting environments.
- Select any or all available configurations
(from configurations that have been created in the product). - Select transparent background for product silhouettes, or set a background color.
- Save button allows settings to be saved for next session.
- Images download to your computer as PNG files.
virtual studio how-to guide
Set up camera views

- Log into the Dopple Platform and navigate to your product.
- A “default view” will be visible
- To set up an additional view, select the + icon
- Name your new view
- Save your Draft
- Publish the Product
Open Virtual Studio
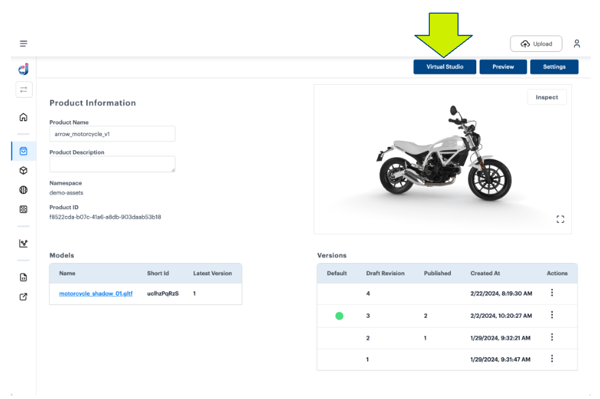
- Select the “virtual studio” button in the top right corner
- Select the published product version you want to use (typically the latest version)
Select settings
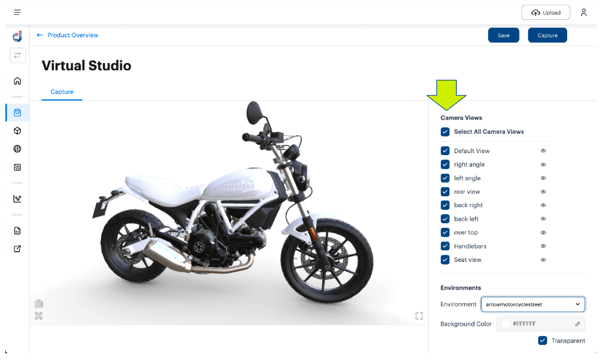
- Select the camera views you want to use to see your product in.
- Select the “environment” you want to see your product in. Your Dopple team will have set up a default lighting environment.
- Select the “background color” you want the images to have when the photoshoot starts. You can also select a transparent background.
SET UP CONFIGURATIONS
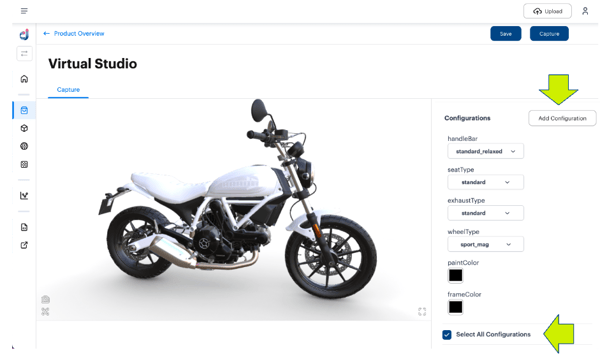
- Set up the different configurations you want to be displayed during your photoshoot. You will set these up individually by going through all the configuration options one at a time, and selecting “add configuration”, once you have identified the configuration options.
- Once you have set up all the configurations you want, you should see the ones you set up displayed at the bottom of the scroll menu on the right hand side under configurations
- You can now manually select individual configurations you want to run a photoshoot on, or select the “all configurations” option to do a photoshoot on all the options you set up in the previous step.
SAVE AND CAPTURE
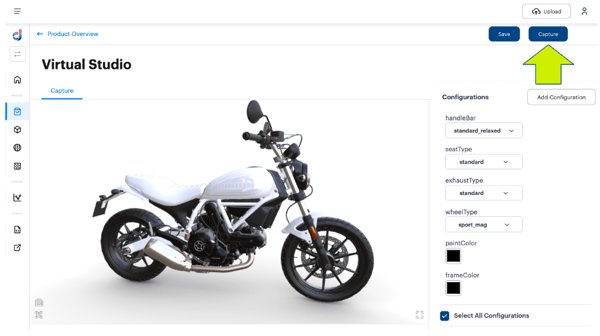
- Now that you have saved all your configurations, there are 2 icons at the top of the right hand side for saving and capturing.
- First select “save” when you have set up all the options for your photoshoot.
- Select “capture” to run the virtual studio process on all the options saved and captured in previous steps
- You will be provided with a batch progress bar while the photoshoot is in progress.
- Once all photos are complete, they will be saved in your downloads as a zip file.
