Dopple’s Experience Designer is a creative feature suite that puts you in the Creative Director’s seat to bring your 3D products to life.
What can you do with The Dopple Experience Designer?
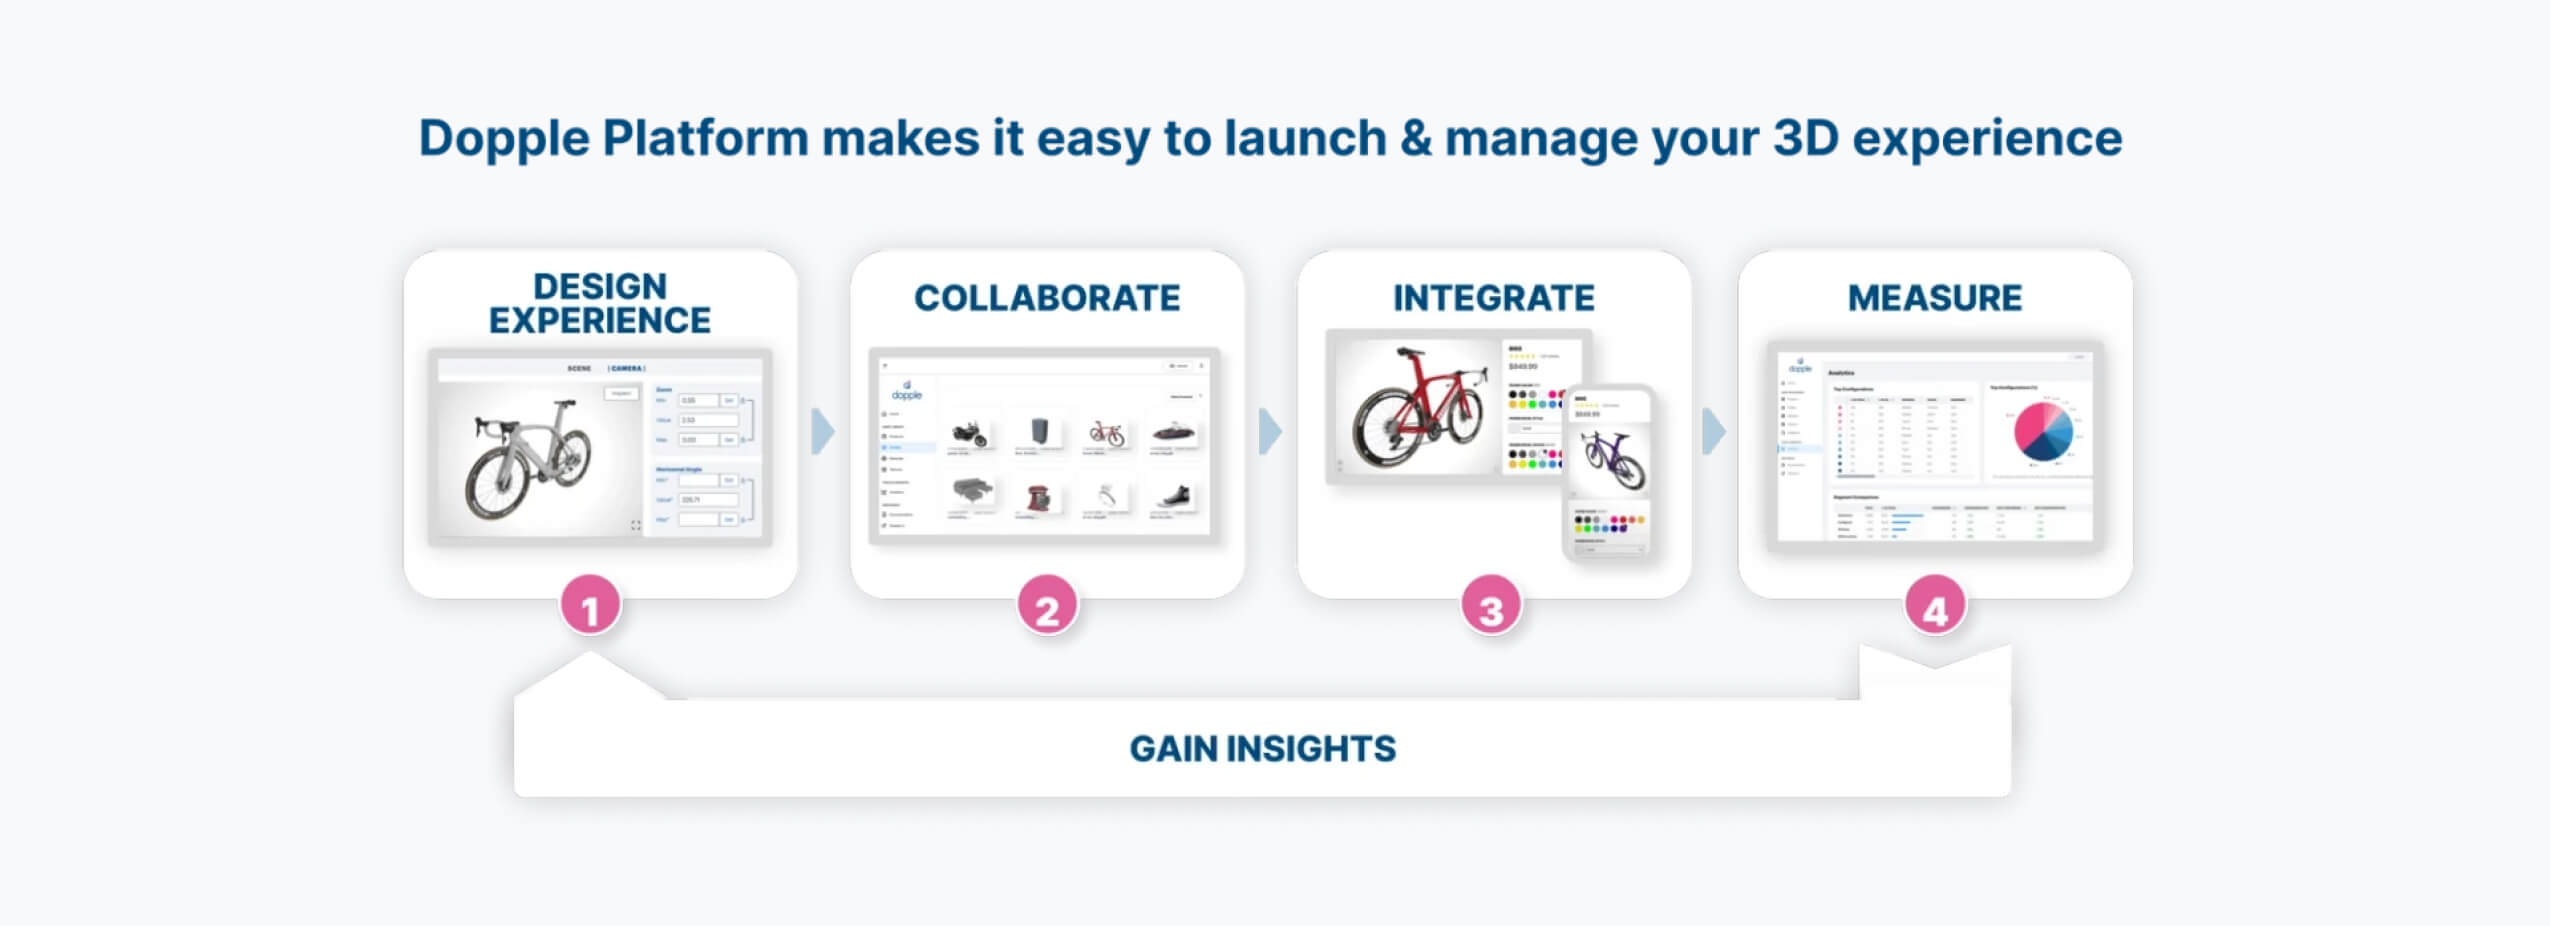
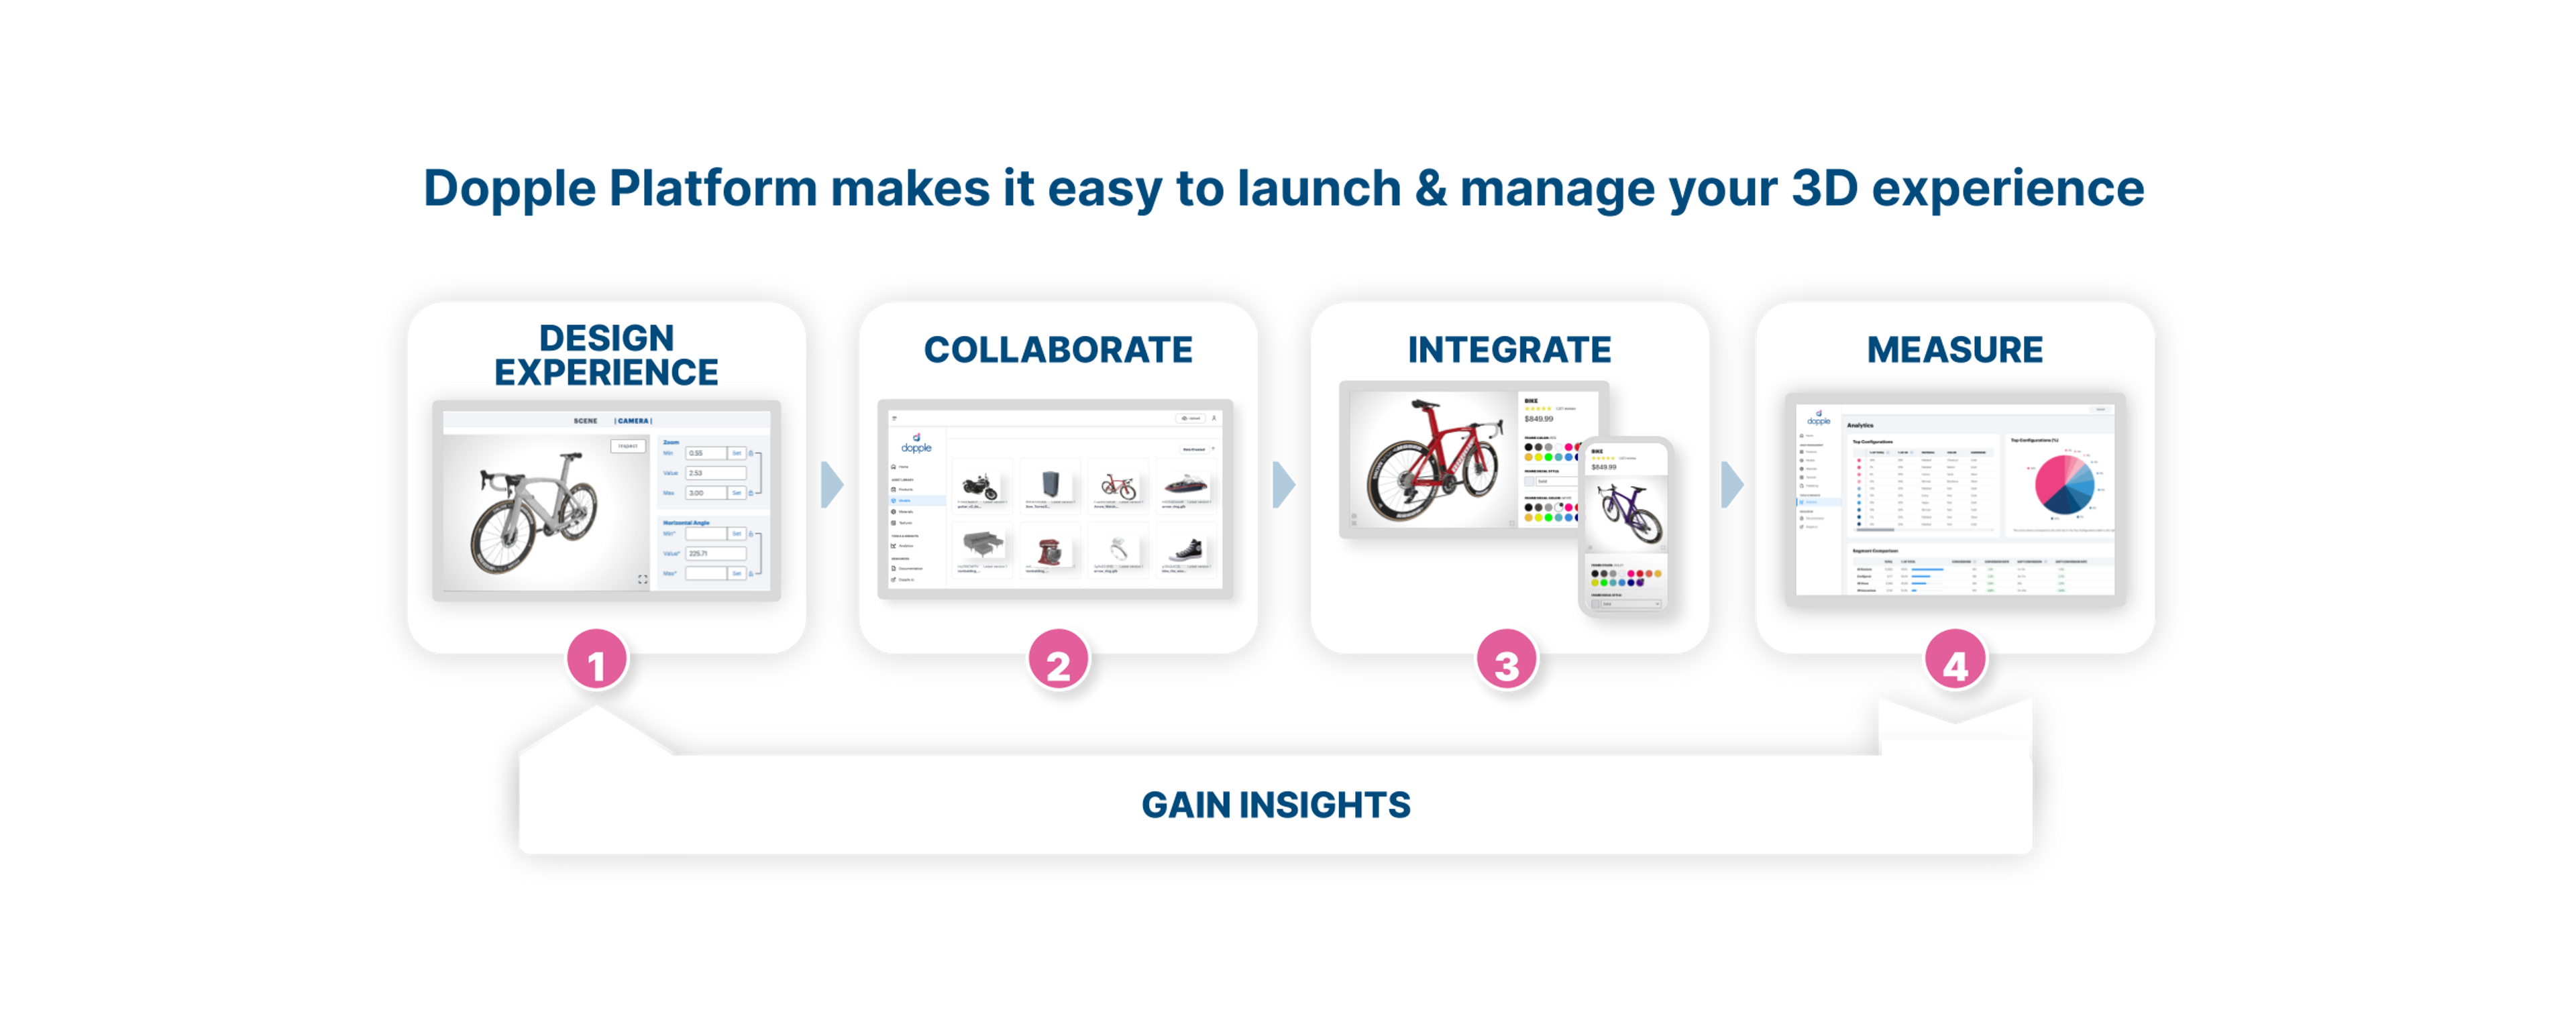
Dopple’s Experience Designer is a creative feature suite that puts you in the Creative Director’s seat to bring your 3D products to life. Experience Designer lets you visually set up your interactive experiences, and build out the features that your buyers will interact with through the 3D implementation on your commerce site. Today, Dopple will guide you through the process of getting your web-ready artwork onto your live commerce site.
Overview of Experience Designer Features
-
Cameras
-
Default Camera Setting
-
Camera Views & Camera Transitions
-
Camera Behaviors
-
-
Hotspots
-
Virtual Photography (coming soon)
Cameras
Default Camera Default
What can I do with it?
Setting the Default Camera lets you set the starting position of the camera when your 3D product loads on the canvas. You can adjust various settings to get the position just right, as well as set limits on where the camera can go (how far, how close, restrictions to where a user can see, etc.) The settings available to define are:
-
Zoom (Radius) - The camera distance to the object (in radians), making the subject appear closer or further away
-
Zoom Min & Max - Sets the minimum and maximum allowed camera
-
distance towards the object (recommended)
-
-
Horizontal Angle (Alpha) - The camera viewing angle (in degrees) of the object moving horizontally left and right
-
Horizontal Angle Min & Max - Sets the allowed camera viewing angle restriction for left and right of object (optional)
-
-
Vertical Angle (Beta) - The camera viewing angle (in degrees) of the object moving vertically up (top) and down (bottom)
-
Vertical Angle Min & Max - Sets the allowed camera viewing angle restriction for top and bottom of object (optional)
-
-
Target - The 3D coordinate (x, y, z) where the camera is aimed
-
Clip Distance - The camera view frustum defining the near and far planes of rendering. Vertices will be rendered when between these two values. Allow or prevent the camera from breaking the surface plane of the product.
-
Near - Sets the minimum distance from the front of the camera, at which vertices will be rendered.
-
Far - Sets the maximum distance from the front of the camera, at which vertices will be rendered.
-
-
Sensitivity - The speed of movement for any given input, such as mouse or touchscreen interaction. A higher setting will move at a faster rate. Adjust to optimize how buyers navigate in 3D on the canvas across devices.
-
Pan - Sets the sensitivity speed when camera is actively panning
-
By default pan is enabled
-
How does it work?
The default camera settings are saved to your 3D Product, and can be adjusted and changed at any time by the Professional Services team. The settings you have saved are the “rules” that the virtual camera will follow, letting you have control over how buyers explore and interact with the 3D canvas.
Why should I use this feature?
Dopple has an auto-framing function which will frame your product based on the outer bounds of your product’s geometry without any action needed by you or your creative team, which happens upon uploading and creating your 3D product. Typically, you will want to make your own fine-tuned adjustments to customize the default camera and have full control over the starting position of the camera, and add any restrictions or limits to where the camera can go.
Are there any limitations on what I can do with this feature?
There can only be one default camera per draft and published version of your product. The settings are limited to those listed above, however in the near future Dopple’s feature will allow you to be able to modify more advanced camera settings, such as the lens, field of view, depth of field, focus mode, and other settings you would have access to with a physical camera.
Camera Views & Camera Transitions
Once you’ve set your default camera and defined any restrictions to zoom or orbit, you can create other camera views that can be worked into your 3D Product Experience. ‘Camera views’ are defined positions in the 3D space that can be used for Camera Transitions, Virtual Photography, and Analytics (give semantic or product relevant names to a view,( i.e. for a bike you could name Camera Views “ Handlebars”,” Wheels”, “Pedals”, and position the camera on those parts of your product).
What can I do with it?
Camera Transitions - Once you’ve created Camera Views, initiate camera transitions on certain actions taken by your buyers to emphasize or showcase parts of your Product.
Camera Transitions is a feature that takes advantage of the Camera Views you’ve created, letting you build a bespoke user experience to automatically animate the movement of the camera to the predetermined positions.
Example: if your product has a detail that is only visible from a certain angle and zoom level, you can create a Camera View that focuses on it, and when a buyer is configuring that part the camera would automatically move from the current position to the Camera View to ensure the buyer sees what is changing, and what to look at. You can craft a virtual tour of your product utilizing Camera Views and Camera Transitions with the Dopple Professional Services team.
Virtual Photography - Camera Views can also be used in Virtual Photography in the Virtual Studio feature. Batch capture photos of your Product at any of the positions you’ve defined in Camera Views for quick and efficient product content generation. More details can be found in the Virtual Studio section.
How does it work?
Define the requirements for what camera views you will need is the first step. You must pass those on to your Professional Services team member for those to be set up. Once camera views have been created and defined by the Professional Services team, they can be used in camera transitions by a Web Developer, or in Virtual Studio via the “select views to include” section. Web Developers have creative flexibility in how they call a camera transition.
Example: A common use case is to initiate a transition when configuring a part of your product that benefits from having the camera positioned and focused on a detail. If you had a configurable handbrake on the handlebars of a bike, you could create a camera view that zooms in and focuses on the handbrake. Your Web Developer could initiate a transition to move the camera to that view when the buyer is clicking the UI element that controls the handbrake configuration.
Example: You could also script a “product tour” which would run through a sequence of camera movements that cycle through the camera views you created. This is a creatively flexible feature which can be experimental and dynamic as you evolve and iterate through your 3D commerce experience.
Why should I use this feature?
Showcase details of your product, and build a more immersive and tailored experience for your buyers as they explore your 3D products.
Are there any limitations on what I can do with this feature?
Currently for camera transitions, you can only use the default linear ease in and ease out functions. Camera pathing is also not available today, calling a transition will move the camera from it’s current position to the new View made in the SetValue call. Since the feature is flexible and largely up to the technical skill of your web developer, you may discover some limitations or technical challenges based on the complexity of your intended UX.
Draw inspiration from Dopple’s best practice guides to find the right experience that drives deeper engagement and more ROI for your 3D commerce site.
Camera Animations
What can I do with it? What are some examples?
Create ‘Custom Camera Behaviors’ and animations for your 3D Experience. This is a creative and flexible feature which can be used to accomplish many different camera behaviors and animations, though there are some best practice examples that you can take advantage of to drive more engagement and draw attention to the interactivity of the 3D canvas. Some examples of animations and behaviors include:
-
Auto rotate - offers the ability to have your 3D product begin rotating on it’s axis upon page load, after a specified User action, after a specified amount of time elapsed, etc (Web Developer has control over how they craft the experience.
-
Shake - Product rotates back and forth then rests at default camera position, calling attention to the interactive 3D Product.
-
Rotate-In - Product rotates into the default camera position, calling attention to the interactive 3D Product.
-
Custom Camera Animation - script any sequence of camera animation to tour your product, queue buyers to the 3D interactivity, or any other goal that is best showcased with automatic camera movement.
-
Custom Camera Transitions (more details in Camera Views section above) - automatically transition the camera to a defined camera view to call attention to details of your product, or give the buyer a “virtual tour” of your Product. Using the camera views feature, you can preset positions for the camera which can be tied to configuration actions, or any action in the UI.
-
Example: Call a camera transition to a detail of your product when a buyer is configuring that part, which will smoothly and automatically move the camera from its current position to a more zoomed in and specific position on your product.
How does it work?
Work with Dopple Professional Services team to define your desired animation. The script will be included in your product’s controller, which can then be used in your 3D experience by your Web Developer to craft how and when to initiate the animation or transition. This feature will be available to manage and setup yourself in the near future as part of the Application Beta program.
Why should I turn on this feature?
Enabling camera behaviors can help to draw attention to the interactivity of your 3D canvas, in case buyers assumed it was a 2D image. They can also draw attention and showcase details of your product by ensuring the camera moves to a position where changes in configuration or features of a product are framed properly.
Analytics trends show better ROI and stronger branded experiences when consumers can view and interact with products in 3D, so this feature is an easy way to ensure that 3D capability is more noticeable.
With all the time and investment into 3D visualization and configuration, it’s crucial to make it obvious in the UX that a product is 3D and not just a static image gallery, and have more control over where the buyer is looking as they interact with your 3D Product.
Are there any limitations on what I can do with this feature?
The camera behaviors and transitions feature is versatile and flexible, but because it is customizable you will want to work with your creative team to test and experiment with how your end buyer’s user experience is crafted.
How do I set this up on my UI?
Dopple’s Professional Services Team will add your desired camera behaviors and animations to your published product, and a web developer can trigger them via a setValue call on your commerce webpage. Adding the camera behavior and animation scripts can be done in the Dopple Application UI in the near future as part of the Dopple Application Beta program.
Can I see an example of how it works today?
Check out the ring demo for auto rotate exploration
Hotspots
Hotspots allow users to place “points-of-interest” on a 3D model, which can be utilized by a Web Developer and woven into your 3D experience. These hotspots are useful for showing additional information about a product, and can even contain interactive elements such as color swatches and buttons to configure that part of the product.Buyers can be provided with information that is tied to a specific location on your product to enhance the discovery process as they interact with the 3D product. Dopple analytics will give you the visibility into which content converts and drives richer engagement through reading the buyers’ digital body language.
What can I do with it?
Adding hotspots to your product allows you to create “points of interest” that are anchored to a specified XYZ coordinate on your 3D model.
Example: you can display a callout on hover or click of a hotspot, and have either text, a gif or image, or an embedded video on the call out. You could craft a virtual tour by incorporating camera transitions on clicking of a hotspot to move the camera to a desired position that highlights a feature of your product. Implementing hotspots is flexible and has great creative potential to craft storytelling and immersive interactions which will help you differentiate your 3D experience.
How does it work?
Today, you can work with Dopple’s Professional Services Team to pick out the places on your product you’d like to add a hotspot, and they will be included as an array in the published product. Dopple will provide the name of the hotspots, which is primarily all a Web Developer will need to get started. From there, they can attach HTML elements to the array of hotspots, and add any content you like such as callouts/annotations or initiate camera transitions.
Creating a new hotspot
The Dopple app is still in beta but nearing release. Once released, you will be able to login and define hotspots for your products in the app’s dashboard. For now, Dopple’s team will work with you to define and position any hotspots needed.
Why should I use this feature?
For complex, high quality, high consideration products, hotspots help tell brand story, convey quality, and provide education, all of which lead to conversion. Hotspots liberate vital product content from the bottom of the PDP, bringing product attributes into context on the 3D product itself where buyers will see it. They help to build buyers’ familiarity with the product and their confidence in their purchase.
How do I set this up on my UI?
Once the desired hotspots have been created by the Professional Services team and published with your product, a Web Developer can attach any HTML content to the array of hotspots. Once a hotspot is created on your product within the Dopple app, you will be able to access its data on your site via the hotspot property on the product instance. This gives full creative flexibility in the visual styling of the hotspots and the content, as well as letting you decide how buyers interact with them.
To see our detailed developer documentation on how this works, check out this link.
